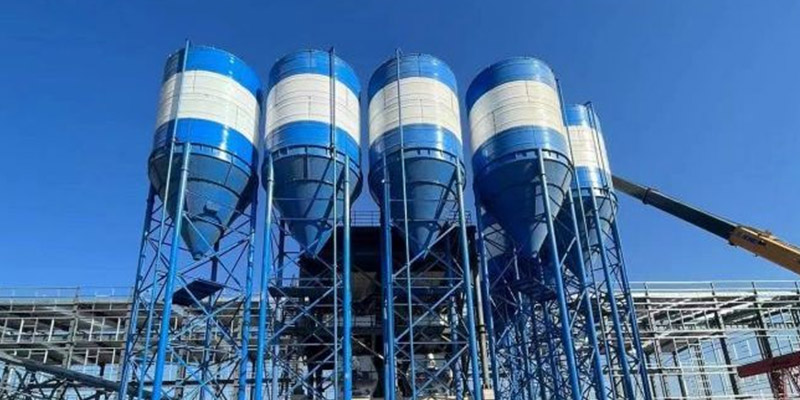
A cement silo is a pressure vessel, a storage structure, and a safety-critical asset — all in one. It stores hundreds of tons of cement under pressure differentials, thermal cycling, and continuous filling and discharging cycles. When it fails, the consequences are severe: structural collapse, blocked discharge, dust emissions, or personal injury.
Most silo failures, however, are preventable. They follow predictable patterns — corroded weld seams, choked vents, failed level indicators, caked hopper walls — and each can be caught by a simple, scheduled inspection before it becomes a failure.
This guide provides a complete cement silo maintenance program: what to inspect, how often, what warning signs to look for, and how to fix what you find. It covers structure, level and weighing systems, venting and dust control, discharge systems, and confined-space safety, with a printable checklist at the end.
1. The Silo Maintenance Schedule at a Glance
| Frequency | What to check | Who |
| Daily (during operation) | Level indicator reading, vent/dust collector operation, discharge valve operation, unusual noises or vibration | Operator |
| Weekly | Air pressure on aeration system, filter bag / vent status, safety valve condition, weld seams visible from ground, foundation settlement signs | Operator |
| Monthly | Discharge valve and gate function, level sensor accuracy vs. actual level, aeration fabric condition, corrosion on shell and legs | Maintenance |
| Quarterly | Full weld inspection (ultrasonic or dye-penetrant on critical seams), shell thickness spot check, ladder/railing/access condition, lightning protection | Maintenance + engineer |
| Annual | Full structural inspection by a qualified engineer, pressure/vacuum relief valve testing, level system calibration, foundation inspection, coating/repainting plan | Engineer + external inspector |
| Every 5 years | In-depth ultrasonic thickness survey of shell and hopper, structural integrity assessment | External specialist |
2. Structure: The Shell, Weld, and Foundation
The shell carries the full weight of the stored material plus wind, seismic, and thermal loads. Failures here are catastrophic, so this is the highest-priority inspection area.
What to check
- Corrosion on the shell and legs.Look for rust streaks, scale, pitting, and thinning — especially at the bottom of the shell, at weld seams, and where the legs meet the base. Cement dust is alkaline and attacks bare steel.
- Weld seams.Cracks in welds usually start at the bottom of the shell near the hopper transition. Check for crack lines, especially after a cold spell (thermal stress).
- A dented or bulging shell indicates internal pressure events or structural overload. Bulging near the top is a red flag for failed venting (the silo sucked or pressurized).
- Check for settlement cracks in the concrete, exposed rebar, water pooling at the base, and lifting of anchor bolts.
- Bolted joints.On bolted silos, verify torque on the ring and flange bolts. Loose bolts cause leaks and progressive failure.
- Check the paint/coating condition. Coating failure accelerates corrosion 5x.
Warning signs that require immediate action
- Visible shell bulging or denting
- Cracks at welds, especially horizontal seams
- Settlement difference between legs (check with a level over a 12-month period)
- Thickness measurement below 80% of design wall thickness
3. Level and Weighing Systems
You cannot manage what you cannot measure. A failed level indicator causes overfill, overpressure, and spills — or empty silos that stall production.
Daily check
- Compare the level indicator reading with the expected level based on today’s feed and discharge.
- If using load cells, compare total weight against expected.
Monthly check
- Calibrate the level sensor: empty the silo to a known level, verify the reading, or use a dip/plumb line from the top access hatch.
- Check the cable/rod of capacitance or guided-wave probes for buildup and damage.
- Verify high-level alarm actually fires by test-filling to the alarm point (or simulate with the test function if available).
Common failures and fixes
| Symptom | Cause | Fix |
| Reading stuck at same value | Probe coated with cement | Clean probe; replace if coated beyond recovery |
| Erratic reading | Loose cable, damaged probe | Tighten/repair; verify wiring shield |
| High-level alarm never fires | Alarm point too high; probe failed | Re-test with test function; adjust setpoint |
| Load cell drift | Moisture, damaged cable | Check junction box; re-zero after emptying |

4. Venting and Dust Control
The #1 cause of catastrophic silo failure is failed venting. When cement is pneumatically conveyed into a silo, the displaced air must escape through the vent or dust collector. If the vent is blocked, the silo pressurizes, and the shell or roof fails.
What to check
- Vent/dust collector filter bags.Check weekly for blinding. A choked filter raises silo pressure. See our pulse jet dust collector maintenance guide for bag care.
- Pressure/vacuum relief valve (safety valve).Test quarterly that it opens at its set point and seals again. A stuck safety valve gives no protection when the filter blocks.
- Vent pipe.Confirm it is not plugged by hardened cement — especially after rain or humid weather.
- Roof access hatch.Must seal fully. A leaking hatch lets rain in, which hardens cement and corrodes the shell.
- Aeration system.Check the air pressure and that aeration pads deliver air evenly. A failed aeration system is the usual cause of discharge blockage (arching). See our silo caking and arching guide.
5. Discharge System
Blocked discharge stops the plant and usually requires people working inside the hopper — one of the most dangerous silo jobs.
What to check
- Discharge valve and slide gate.Check monthly for free operation. Sticking gates are usually caused by cement packing in the guides.
- Rotary airlock valve or double flap valveunder the silo: check the operation, wear, and airlock seal. See our rotary airlock valve page and double flap valve page.
- Hopper walls.Look for buildup (cement sticking to hopper walls), especially at the transition from cylinder to cone. Buildup reduces live capacity and eventually blocks the outlet.
- Flow aids.Check vibrators or air blasters function correctly. Air blaster air supply must be dry.
- Discharge spout / loading equipmentat the silo outlet (if used for truck loading): inspect for wear and dust leaks. See our telescopic loading spout page.
6. Safety Systems and Confined-Space Rules
Silo entry is a confined-space operation with fatal risk: collapse, engulfment, toxic or oxygen-deficient atmosphere, and falling material.
Inspection of safety equipment (monthly)
- Ladder, cage, and rest platforms: check welds, corrosion, rungs.
- Guardrails on the top platform.
- Rope and harness anchor points at the top hatch.
- Lighting, if installed.
- Lightning protection: check continuity and grounding resistance.
Entry rules (never skip)
- Lock out and tag outall feed, discharge, and aeration systems.
- Test the atmosphere(O₂, CO, combustible gas) from the top and through access openings before entry.
- Use a mechanical rake or vibrator from outside first— never break a bridge by entering the silo.
- No one enters alone.Two-person rule with a watchman outside at all times.
- Use a full-body harness and retrieval lineattached to a fixed anchor.
- Never stand on material inside the silo— it can collapse and engulf you in seconds.
- If material is bridged, do not enter— use a lump breaker, air blaster, or external vibrator. See our lump breaker guide.
7. Common Silo Problems and Quick Fixes
| Problem | Likely cause | Fix |
| Silo pressurizes when filling | Blocked vent / choked filter bags | Clear vent; replace or clean filter bags; test safety valve |
| Discharge blocks (arching) | Failed aeration, moist cement, no flow aids | Restore aeration pressure; dry air supply; install air blaster |
| Level indicator reads wrong | Coated probe or failed sensor | Clean/replace probe; recalibrate |
| Wall buildup (caking) | Moisture ingress, condensation | Check roof seals; dry the conveying air; see caking guide |
| Rust streaks on shell | Coating failure | Clean, spot-coat, plan full repaint |
| Cracks at welds | Thermal stress, fatigue | Engineer evaluation; grind and re-weld; monitor |
| Rainwater in silo | Leaking roof hatch | Reseal hatch; check vent pipe orientation |
| High-level alarm silent | Sensor failure or wrong setpoint | Test; recalibrate; never disable the alarm |
8. Cement Silo Inspection Checklist
Copy this to a clipboard or laminating sheet for each inspection:
Daily
- Level reading matches expected fill
- Vent / dust collector running and clear
- Discharge valve operating
- No unusual noise, vibration, or dust escape
Weekly
- Aeration air pressure normal
- Filter bags / vent visually clear
- Safety valve free and sealing
- Visible weld seams and legs: no new cracks or rust streaks
- Foundation: no new settlement or water pooling
Monthly
- Level sensor calibrated against actual level
- High-level alarm tested
- Discharge gate and valve operate freely
- Hopper walls: no significant buildup
- Ladder, cage, railings, anchor points intact
- Aeration pads / air blasters function
Quarterly
- Safety valve tested at set point
- Critical welds inspected (dye-penetrant or ultrasonic where required)
- Shell thickness spot check (where coating has failed)
- Lightning protection continuity checked
Annual
- Full structural inspection by qualified engineer
- Load cell / level system full calibration
- Foundation and anchor bolts inspected
- Repainting / coating plan updated
9. FAQ
Q1: How do I inspect a cement silo?
Start with a daily visual check of the level indicator, vent, and discharge valve while the silo is in operation. Then work through the weekly checks of aeration pressure, filter bags, and visible structure. Monthly, calibrate the level sensor and test the high-level alarm. Quarterly, test the safety valve and inspect critical welds. Once a year, schedule a full structural inspection by a qualified engineer. The printable cement silo inspection checklist in Section 8 covers every item with the right frequency.
Q2: How often should a cement silo be inspected?
Daily visual checks by the operator, weekly checks of vent and aeration, monthly checks of level and discharge systems, quarterly weld/safety valve checks, and a full annual inspection by a qualified engineer. Structural thickness surveys every 5 years.
Q3: What is the most common cause of silo failure?
Blocked or failed venting. When displaced air cannot escape during filling, the silo pressurizes and the shell or roof fails. Never operate a silo with a choked vent or a disabled safety valve.
Q4: How long does a cement silo last?
With proper coating and maintenance, a steel cement silo lasts 25-40 years. Corrosion at the shell base and hopper transition is the usual failure point; an annual coating inspection and prompt spot repair extends life dramatically.
Q5: Why does my cement cake on the silo walls?
Moisture. Condensation inside the silo and humid conveying air cause cement to hydrate and stick to walls. Check roof hatch seals, dry the conveying air, and inspect the vent for rain ingress. See our caking guide for the full fix.
Q6: Is it safe to break a material bridge by hitting the silo?
No. Hammering the shell can damage the structure and the bridge can collapse onto you. Use external vibrators, air blasters, or a lump breaker. If the bridge must be broken from inside, follow confined-space entry rules exactly — and never enter alone.
Q7: How do I know if my silo has structural problems?
Visible bulging, weld cracks, corrosion thinning, or foundation settlement are the signs. If you see any of these, stop using the silo and have a structural engineer inspect it. A thickness survey (ultrasonic) gives the definitive answer.
Q8: Can aeration pads fail?
Yes. Aeration fabric plugs with fines and the air supply can carry water. A failed aeration system is the most common cause of discharge arching. Check air pressure weekly and verify even airflow; replace fabric every 3-5 years.
Q9: What should I do if the high-level alarm sounds?
Stop filling immediately and investigate — never override the alarm. Check the actual level visually from the top hatch (with safe access), verify the vent is clear, and identify why the level rose faster than expected.
10. Summary
Cement silo maintenance is not complicated, but it is unforgiving. The program fits on one page:
- Daily: watch level, vent, and discharge.
- Weekly: check aeration, filter, safety valve, and visible structure.
- Monthly: test alarms, calibrate level, inspect discharge and safety equipment.
- Quarterly: test the safety valve and inspect critical welds.
- Annually: full engineer inspection.
The three failures that kill — blocked venting, wall caking, and discharge arching — are all preventable with this schedule. And when anyone must enter the silo, the confined-space rules are absolute.
If you are specifying a new cement silo or upgrading a silo discharge system, contact Darko Cement with your capacity and application. We supply cement silos from 50 t to 1,000 t+ with matched discharge valves, level systems, and dust control. For new installations, start with our cement silo selection guide.